We have run through the functions below in their most logical order but with ezBooks you can start by making the purchase and then add a new supplier's details later. This means in real life you can pick your own order of doing things.
ezBooks comes in two versions (Full and Lite) and
you can select a cash basis or an accruals basis of accounting. All these versions appear similar
on the screen but there are differences. We have used the full cash basis in this section of the
tutorial as it contains all the features you are likely to come across. If you are using the
Lite Version you should skip the sections on customer details, posting sales, etc. The section
How to pay money is the only one relevant for you.
In this chapter we will tell you:


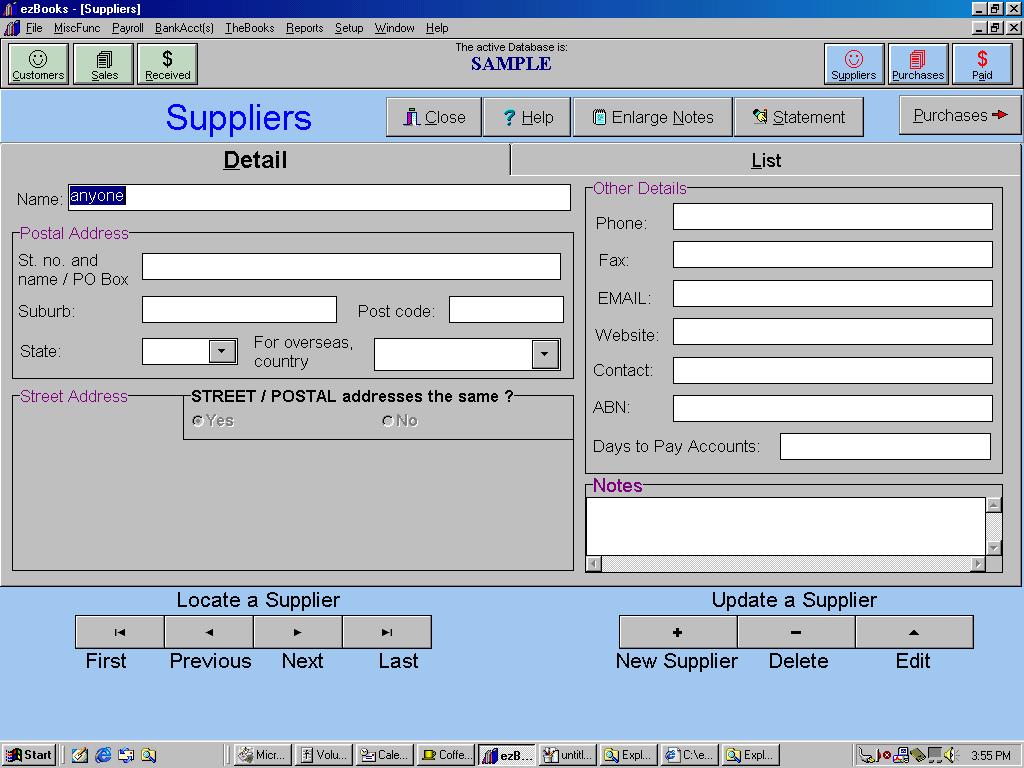
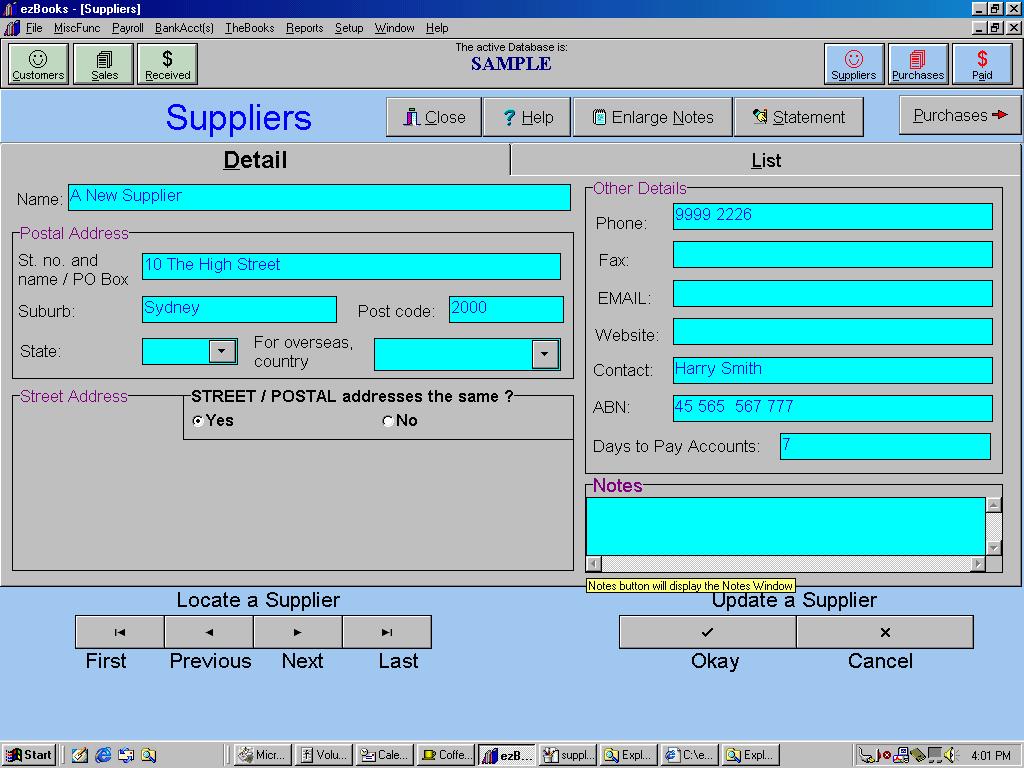
A word of warning - ezBooks uses the name you enter in this supplier record as the unique identifier for your supplier. You cannot have two suppliers with the same name (you have to add a different character to one of them - that can be as little a difference as 'Mr' and 'Mr.') and once created you cannot change a customer name. If you require a new supplier name just set up a new account in that new name. Before you commit a new supplier's details take the trouble to re-read the supplier's name you have entered and make sure you are quite happy with it.
Hit the Tab key to move from the first box.
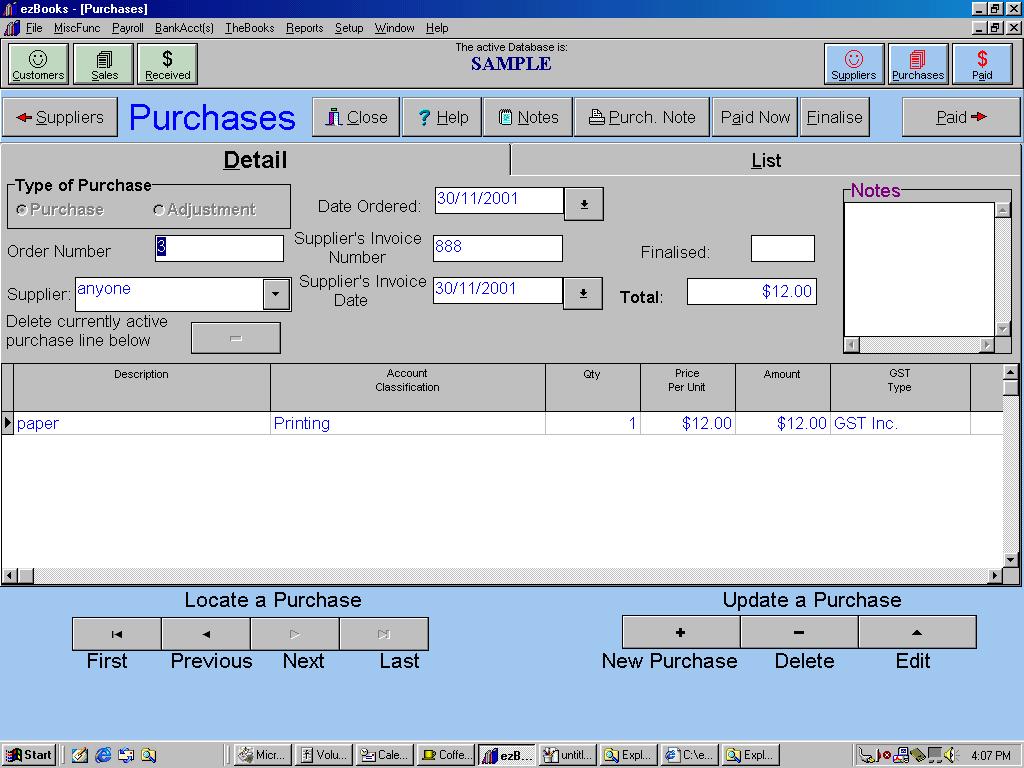
Now we will demonstrate how flexible ezBooks is. Most accounting packages will only allow you to select from existing suppliers, that is suppliers you have already logged into the supplier screen. Of course ezBooks will allow you to recall existing suppliers but it will allow you to enter new suppliers on the run. To show you how to do this you can click on the drop down triangle at the right hand end of the Supplier box. You will see that the list shows you the suppliers we previously entered 'A New Supplier'.
Click on the triangle again to close the drop down list and then type 'a' in the Supplier box. Now hit the Tab key and you will see that the highlighted name has been entered into the Supplier box. You can recall any old suppliers using this technique.
Now use Shift Tab to move backwards into the Suppliers box. Try typing 'Michael Cain'. You will see that the box accepts this new name and in fact a supplier record will be created just as soon as you move out of this box. Naturally, if you need them, you can go to the suppliers input screen once you have finished here and enter any further details.
Hit the Tab key. The cursor now moves into the Date Ordered box. ezBooks envisages that users may wish to record purchases in their system prior to delivery and receipt of the purchase invoice. The system will offer you today's date as a default but you can select any date on a little calendar if you click on the pull down triangle at the right hand end of the date ordered box. You can also simply type in the start of the date, eg 6/7 and the system will fill out the rest. Be careful when you do this around the year end. ezBooks selects the current year so you can find that 25/12 entered in the next year becomes the coming December!
If keeping a record of the date a purchase order is placed with you is not of importance to you simple accept the default each time and move on.
Hit Tab and move down into the Supplier's Invoice Number box. Don't forget that with the GST it is important that you have an invoice from your supplier and that you record the number.
Hit Tab and move down into the Supplier'sInvoice Date box. You should enter the date of the supplier's invoice here. However, a word of warning, if you have already made a bas return covering the period into which the date falls you should enter a later date. Once a return has been made the purchase will have to go on your next bas or you will not get relief for the gst.
Hit Tab and you will move into the Notes box. You can make notes of any nature in this box.
Hit Tab and you will move down into the tabular part of the form. You can enter any number of lines to a purchase. The first column is entitled 'description' and is for the entry of a description of the goods or services purchased. eg Elextricity, Washers - 20 gauge, etc Most accounting packages force you to enter stock items and descriptions elsewhere but ezBooks allows you to treat these items just like the names of suppliers, explained above. If you start typing Widgets (and you have already done the sales tutorial) you will see the entry jumps to Widgets.
Hit Tab and the cursor moves into the Account Classification column. ezBooks does not come with a chart of accounts. We have adopted a format which allows you to create and maintain the accounts you want with the names you decide. These accounts are just like the pages in an old fashioned general ledger. If you click on the drop down triangle at the right hand end of the Account Classification box you will see a list of the existing accounts (we ship the system with the minimum necessary accounts for any accounting system). There is a Purchases account and you could use this but if you wish to have finer classification (or if it was an expense account like 'phone & fax') you can create the new account simply by typing 'Rent Payable' (or whatever suits you).
Do this now and then hit the Tab key. ezBooks will warn you that you will have to tell it what type of account this is. You can find a full explanation of how to do this here. Back to the details section, you are now in the Quantity column. Normally you will either enter a number of items (and in the next column the amount per item). You can of course enter so many hours (and in the next column the rate per hour). If you do enter time you should decimalise the minutes (ie 1 1/2 hours = 1.5).
Enter '10' and hit Tab. This moves you into the Price per Unit column. Now enter 100 as a value and hit Tab. You will see that ezBooks has calculated the total value. Now you will have to select the tax status (for GST) of the transaction. Click on the pull down triangle and you will see there are four options. Select GST Inc in this case and then hit Tab. You can now add a comment if you wish and this comment will appear on any purchase note. Just so you can see the effect type 'Just a comment' and click on Okay to finish the purchase.
Now you have entered the purchase you may wish to produce a purchase note. Most smaller businesses don't bother with this step but the functionality is there if you want it. ezBook's purchase screen allows you to enter the details of a transaction for record purposes, or for the purpose of producing a purchase note, without the transaction becoming part of you accounts. You will be able to return to the screen and find it at any time but until you finalise it the purchase is not included in your purchase day book or any other part of your account.
Click on Purch. Note just to the right of centre of the main row of
buttons.

Type 'Deliver after 5 pm' in the box and click Continue. A print manager will be revealed allowing you look at the purchase note prior to printing. Click on the zoom button (second from the left on the top menu bar). You can use the printer icon to send the purchase note to your printer (click on it, fourth from the right on the top menu bar).
Click on Exit to return to the main screen. Nothing you have done finalises the transaction. To actually make the purchase part of your accounting records tyou have to click the Finalised button. If you had not obtained the date and invoice number of the purchase this button would refuse to finalise the purchase and remind you of what information is missing.
It may be that you pay for the purchase at the same time you issue the invoice. In order to save you the time of re-entering data in the Paid screen a Paid Now button is located next to the Purch. Screen button.
Click on Paid Now and the following GUI will appear:
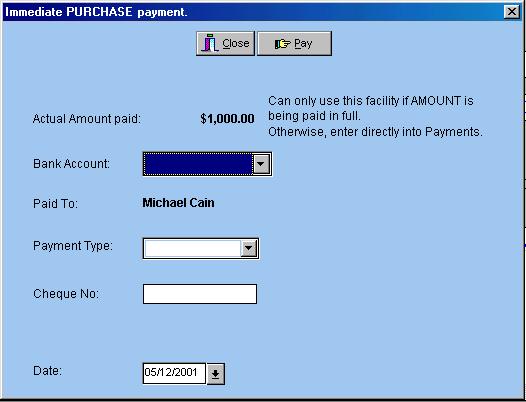
Hit Tab to move out of the first box. If you issuing a cheque you should enter a cheque number here. Hit Tab and you move into the date box. This defaults to the current system date. Change it if you want to, otherwise hit Tab to move on.
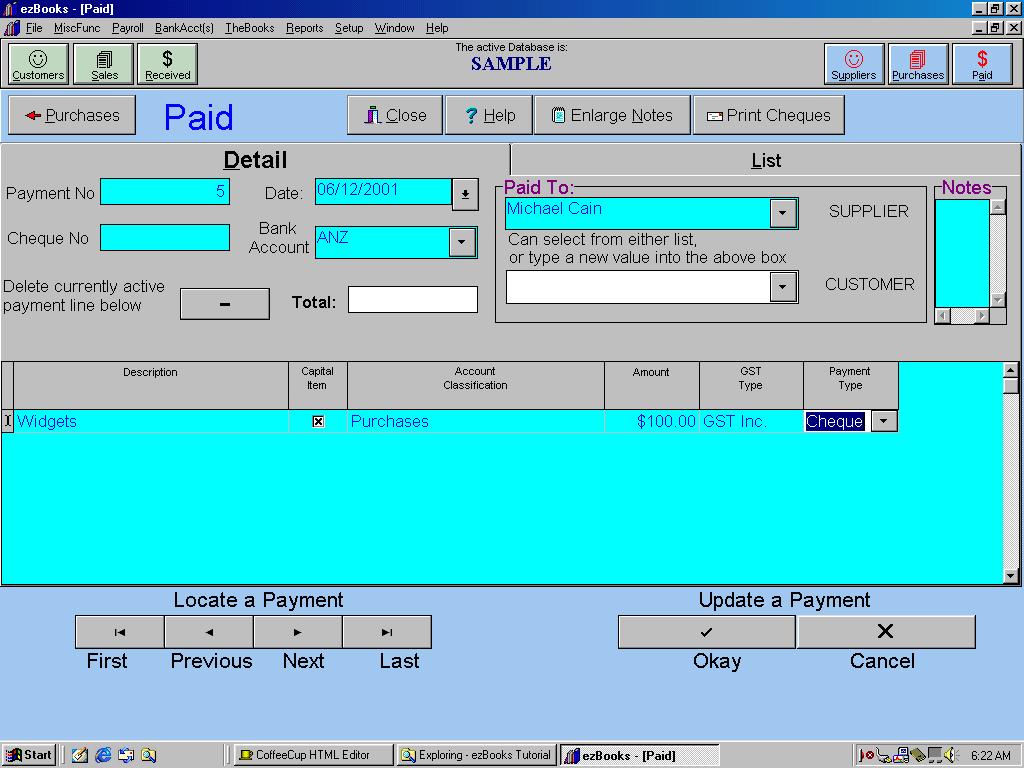
You will find yourself in the Bank Account box. This box holds the short reference to your bank accounts. ezBooks comes with a pseudo-bank account entitled TILL. This might be your top draw or a tin box or a real till but, conceptually, it is somewhere you put receipts, cheques and cash, until you actually bank them and out of which you might make petty cash payments. Normally entries in the Paid screen will be coming directly from your bank account. We already created a bank account at Westpac earlier and most accounting systems will force you to create bank account in a separate screen. Type 'ANZ' in the Bank Account box and hit Tab. You just created a new bank account on the run.
It makes sense to keep a record of who you pay. You can enter any name in the Paid To box(es). Normally you simply make an entry in the first box which has the word 'SUPPLIER' next to it but if you paid a customer use the second box which has the word 'CUSTOMER' next to it. Try typing 'm' and Tab in the first box and you will see that the name Michael Cain was waiting for you in the list.
Hit Tab again and the cursor will move into Notes. You can keep any form of note in this area.
Hit Tab and the cursor will move into the tabular part of the form. In the cash basis of ezBooks (which we are using for this part of the tutorial) some of the entries you are making might appear repetitive. This is because in the cash basis only entries in your cash book (and the Paid screen can be considered to be the debit side of your cash book) are incorporated into your tax records/books. If you use the accruals basis you will notice you are not asked for so much information at this stage.
To demonstrate some of the ease of use of ezBooks, type 'w' and hit Tab. You will see that your previous entry of 'widget' is waiting for you in the drop down list and that it has been selected and entered.
You have to tell the ATO if something you purchase is of a capital nature (a new car or computer) and you 'remember' this by selecting the box in the next column - Capital Item. You can either click on it with the mouse or simply use the space bar to place a 'x' into it. Do this now and then hit Tab.
Now type 'pu' and hit Tab and you will see that you have selected Purchases in the Account Classification column.
Type 1000 and hit and Tab and you will see that $1000.00 has been entered.
With every payment you have to tell ezBooks about its GST character. Click on the drop down list triangle at the right hand end of the GST Type box. Pick GST Inc (by clicking on it) and hit Tab. The top item in the tax type list is 'Adjustment' you should pick this when you are paying back money you have previously received from a customer and upon which you charged them GST.
Click on the drop down list triangle at the right hand end of the Payment Type box and chose a type. Select Cheque and hit Tab.
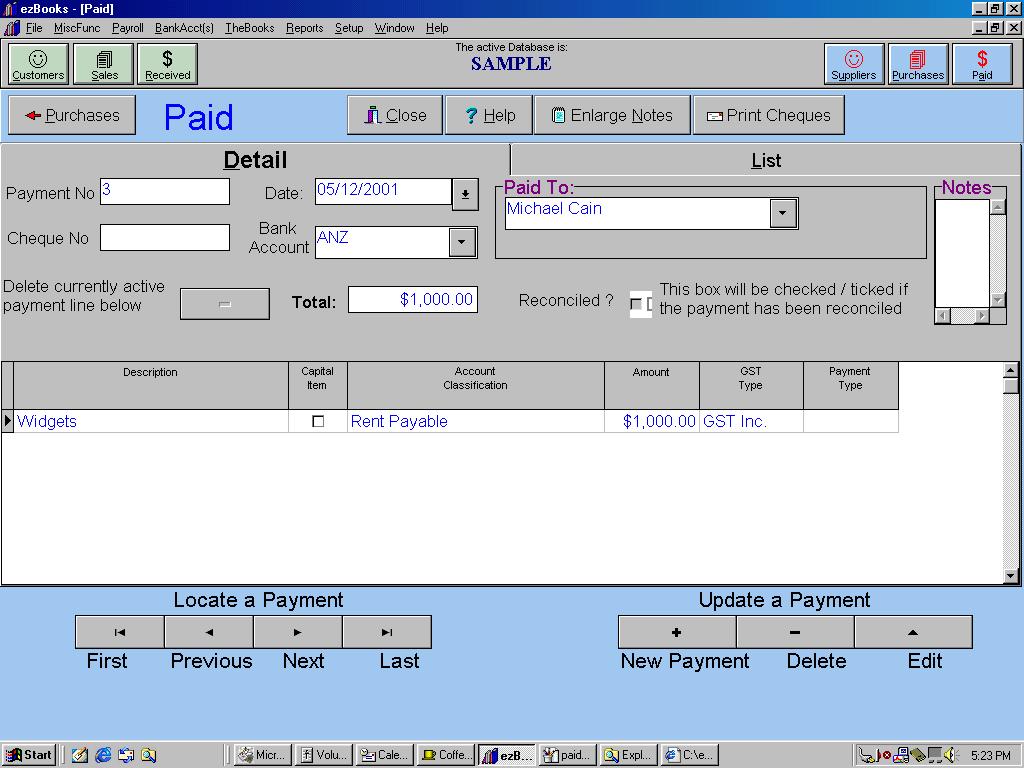
Your screen should now look like the one shown below:
