Chapter 6 - How to do a year end
Introduction
Once a year you have to do a year end. That is you have to clear off all your income and
expense accounts to your profit and loss account. Technically, you should post any accruals
and prepayments into your books and then reverse these after you have zero'd your accounts.
However, if you could do all that you wouldn't need an accountant so what we will do in this
chapter is simply zero the accounts and then rely on your accountant to tell you what journal
entries you should make to ensure the new years figures commence correctly. None of this will
stop you going on using your accounts and your account balancing.
In this section we will tell you:
You produce a trial balance through TheBooks > General Ledger / Trial Balance.
Select them now:
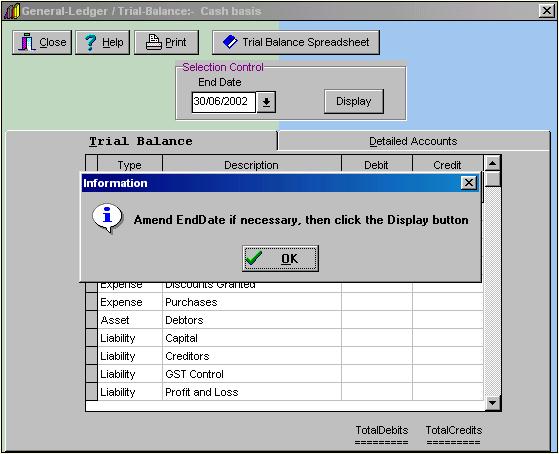
The information GUI remind you that the normal end date for the GUI is set to the coming
30 June. If you want to close off the past financial year you are going to have to change
the end date. We will do this next. Now click OK.
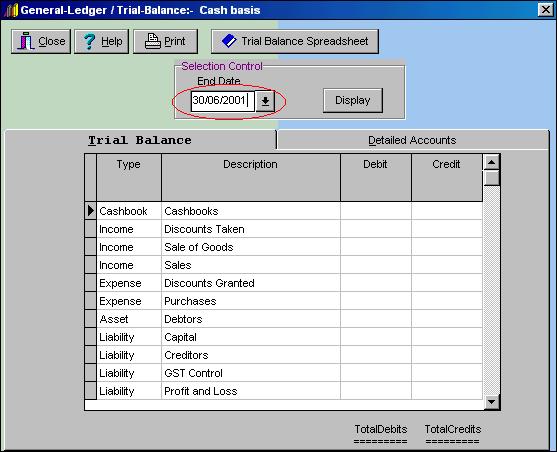
If you look at the 'Selection Control - End Date' you will see it is set to 30 June [next year].
You can change this in a couple of ways. By now you will have used the little date manager which
pops up when you click on the triangle in the right hand corner of the date box but the more
direct way is to simply place the cursor behind the last number of the date (using the
mouse) and then to use Backspace to remove the last number and type in the number you
require. We have circled the section red in the GUI shown below:
The click on Display. The screen will advise you that it is creating the trial balance
from the database and shortly the results will be displayed:
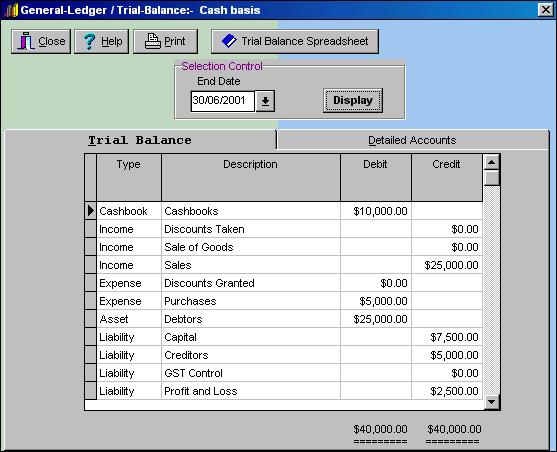
If you want to look at a particular page in the ledger just click on the name. Try clicking
on the account name 'Purchases' and you will see you switch over to an account view of
this item.
With the General Ledger GUI still open, click on Trial Balance Spreadsheet.
The screen reveals a typical columnar form
of trial balance spreadsheet:
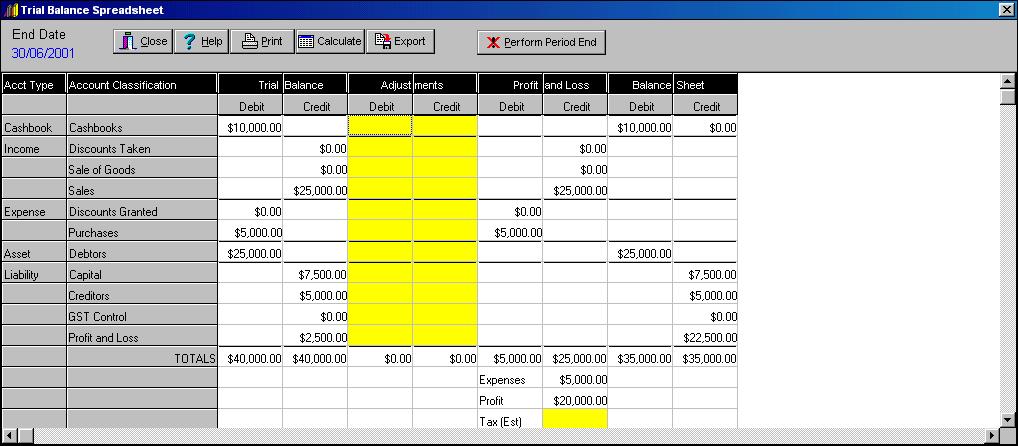
You can enter any adjustment you want in the adjustment column and click Calculate
and the spreadsheet will produce profit & loss and balance sheet items. If you are using
the cash basis of accounting it is unlikely you will want to make any adjustments and you
should print off a copy of the spreadsheet for your accountant.
Click Print and the report viewer will be revealed and you can print off the document
and leave the viewer bly clicking on Exit.
Now click on Perform Year End. The following GUI will appear:

This is just reminding you to make sure that you have your year end set to the right date.
Just check them, they are circled red in the fragment of the spreadsheet GUI shown below:

Assuming it is OK click OK and the following GUI will be displayed:

Click OK and then click Close on the spreadsheet GUI. If the General Ledger
GUI is still showing the Detailed Account view, click on Trial Balance. Now
just to prove something has happened, look at the sales line. It has a $25000 balance. Now
we will recalculate the trial balance after the year end postings have been made. Click
Display again.
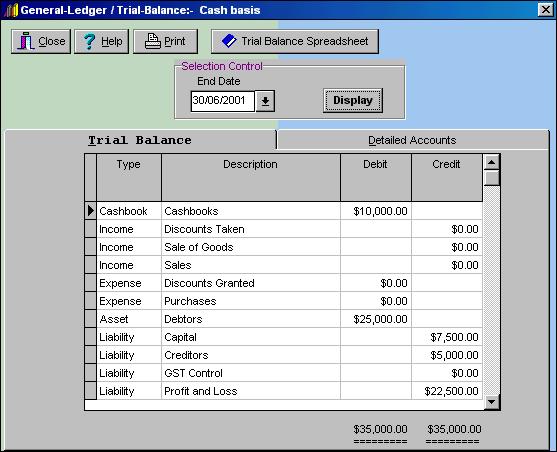
As you can see the income and expense accounts have been set to zero and the balance on
profit and loss account has changed.
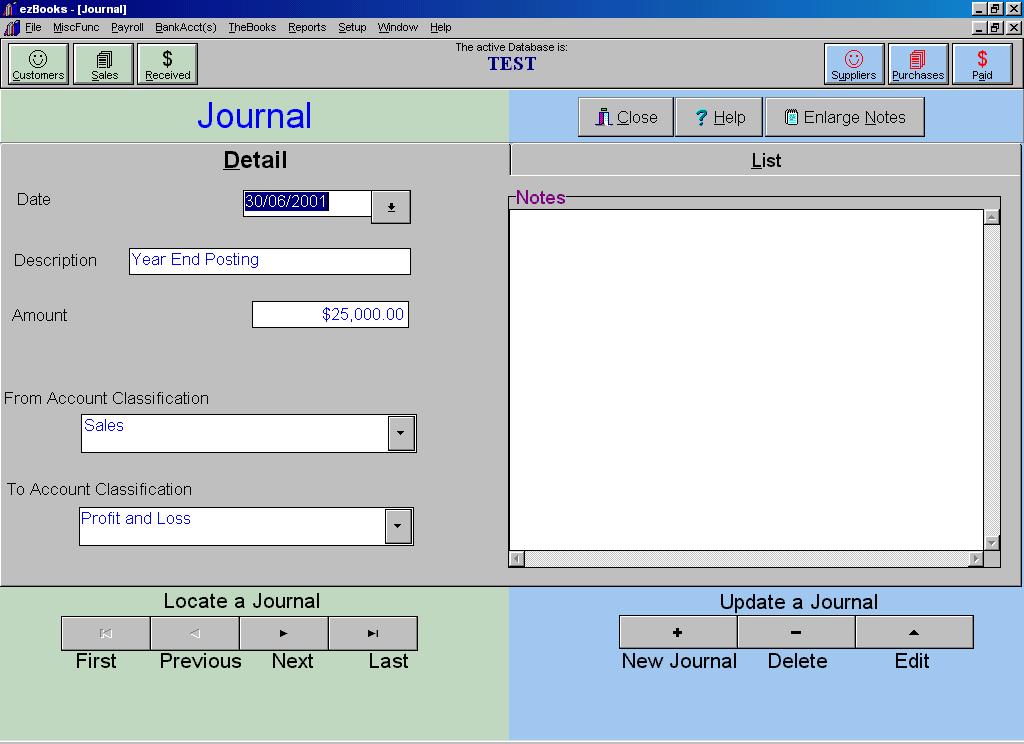
The year end you performed above automatically generated the journal entries necessary
to perform a year end. You have seen the accounts have been zeroed, now we will
look at the journal
and show you how to make a journal entry. You should ask your accountant to give you any
journal entries which are required after he deals with your year end figures and will simply
assume that he gives you one. Say you want to write off your debtors
(after the year end) because they
have become bad. Your accountant will have taken care of this in your tax return
but you have to make your account correct. You would do this by making a journal entry.
You make journal entries through the top menu bar.
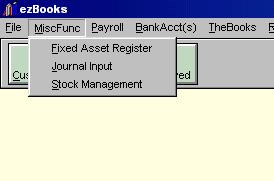
Select MiscFunc > Journal Input:
Click on List so you can see the alternate view. As you can see it reveals the
actual year end posting which we made in the last section:
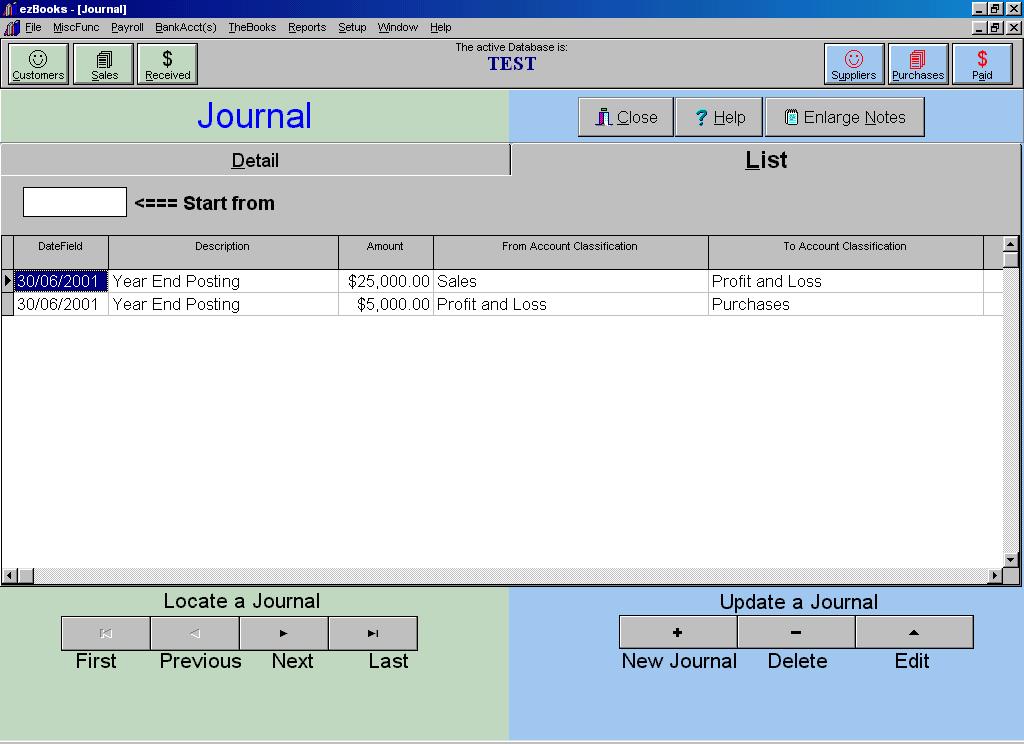
If, for some reason you wished to reverse your year end entries all you would have to
do is select the lines one by one and use Delete.
Now click Detail and we will
make the journal entry specified above.
- Click on New Journal
- Enter a date (you can use the drop down triangle at the
right hand corner of the date box or enter a date)
- Hit Tab
- Enter a description 'Bad Debts'
- Hit Tab
- Enter 25000 and hit Tab
- Click on the drop down list triangle at the end of the 'From Account Classification'
- Select Debtors and hit Tab
- Click on the drop down list triangle at the end of the 'To Account Classification'
- Select Profit and Loss and hit Tab
- Click Okay
Your screen should look like this:
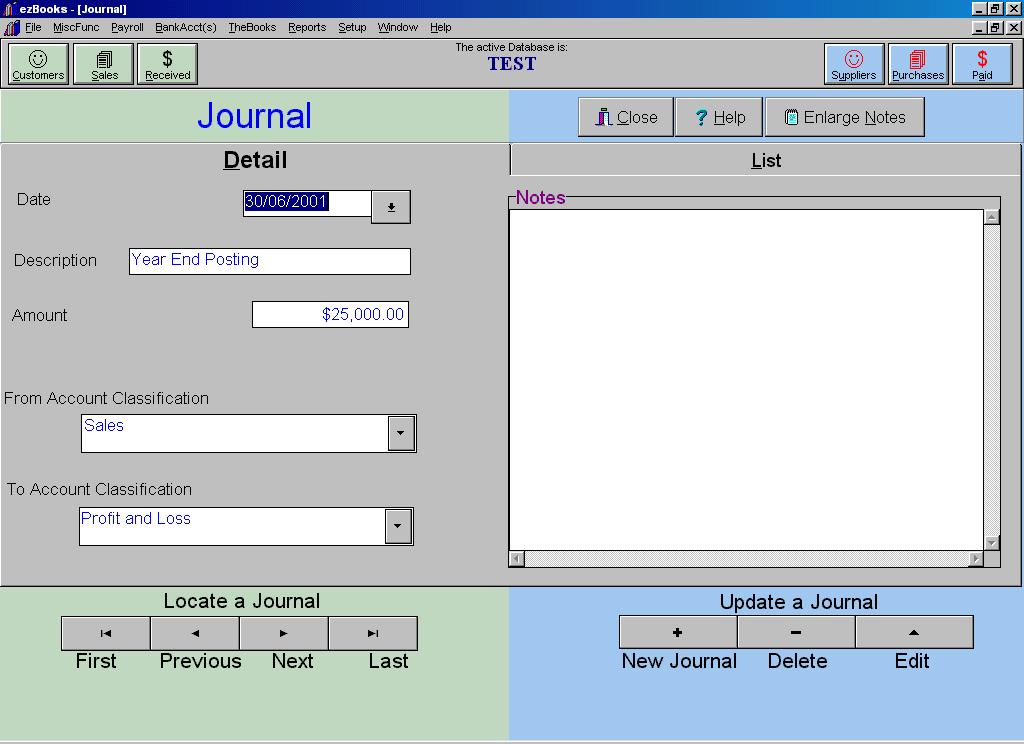
And you have successfully made a journal entry.


